Requirements
- Account Admin access to either: Autodesk Construction Cloud (BIM 360, Autodesk Docs or Autodesk Build) or Procore.
Steps to set up on Autodesk Construction Cloud
Setting up BlackSmithSoft Advanced Work Packaging (AWP) requires your ACC account admin to be involved. Here are the 3 easy steps to follow:
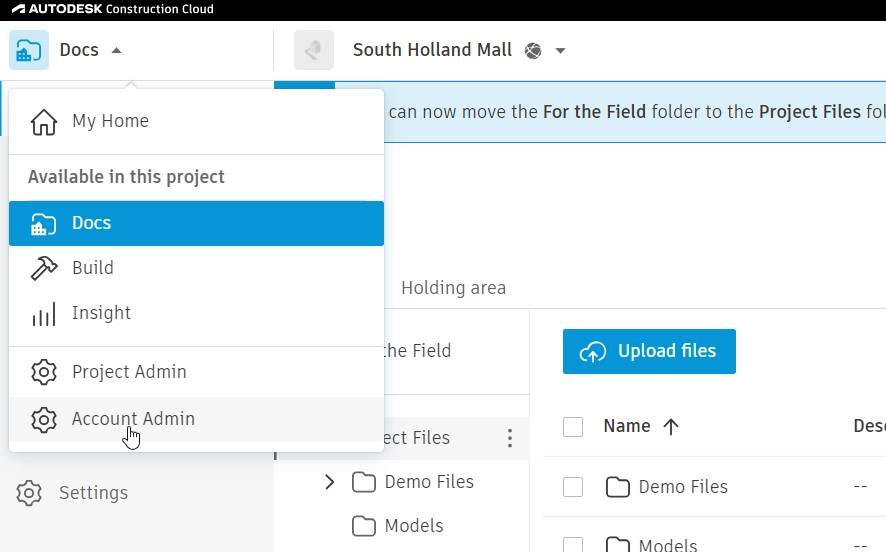
A) Account ID: Send BlackSmithSoft licensing (licenses@blacksmithsoft.com) your Account Id. Your administrator will need to navigate to Account Admin which can be found in the top left-hand corner of the Docs / Build main screen.
Then click on Settings.
Scroll down to the ‘Advanced’ section and copy-paste the Account ID and send it. That’s it!
B) Project ID: Now we need to retrieve the Project ID. Make sure to create an ACC project first or select a project you are currently using.
Go to your project and copy-paste the URL you see in your browser.
E.g. https://acc.autodesk.com/docs/files/projects/5fa44c41-bb79-47f4-b7bc-649b59c8b426?folderUrn=urn%3Aadsk.wipprod%3Afs.folder%3Aco.9ru89kFjQeSdj5JNVsGifQ&viewModel=detail&moduleId=folders
Please copy-paste the whole URL and send it.
C) Install the BlackSmithSoft AWP app: Go to Account Admin, and click on Apps.
Scroll to find BlackSmithSoft AWP, and click to install.

On the next page, click the blue Install button.
That’s all from your side. The next step is for BlackSmithSoft to enable your instance.