Requirements
- DoCheck QR account
- Procore Admin rights/permission with access to Tools -> Documents
Steps to add DoCheck to Procore
1. Go to https://marketplace.procore.com/apps/docheck-qr.
2. Click on the Login to Install button and log in. Once you log in, the button will become Install App. Click on it to get started. Make sure you have admin permissions to install Marketplace apps.
3. At the popup window in Procore, click Install.

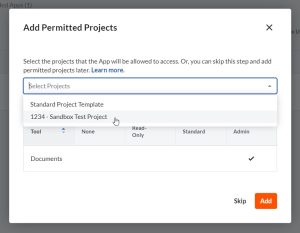
4. Next, it is time to select the project(s) you want DoCheck to have access to. Click on the Project drop-down list, select the projects and click Add.
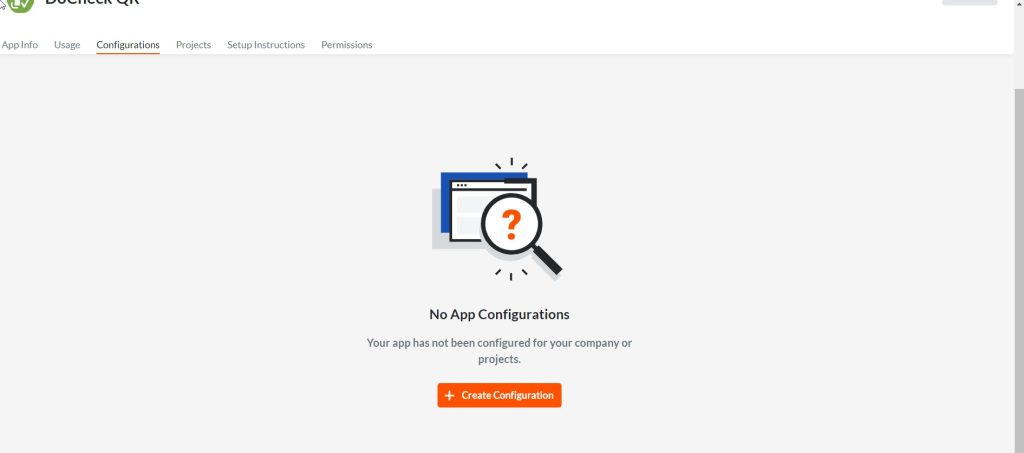
5. Next you will be taken to DoCheck’s configuration page in Procore. Click the +Create Configuration.
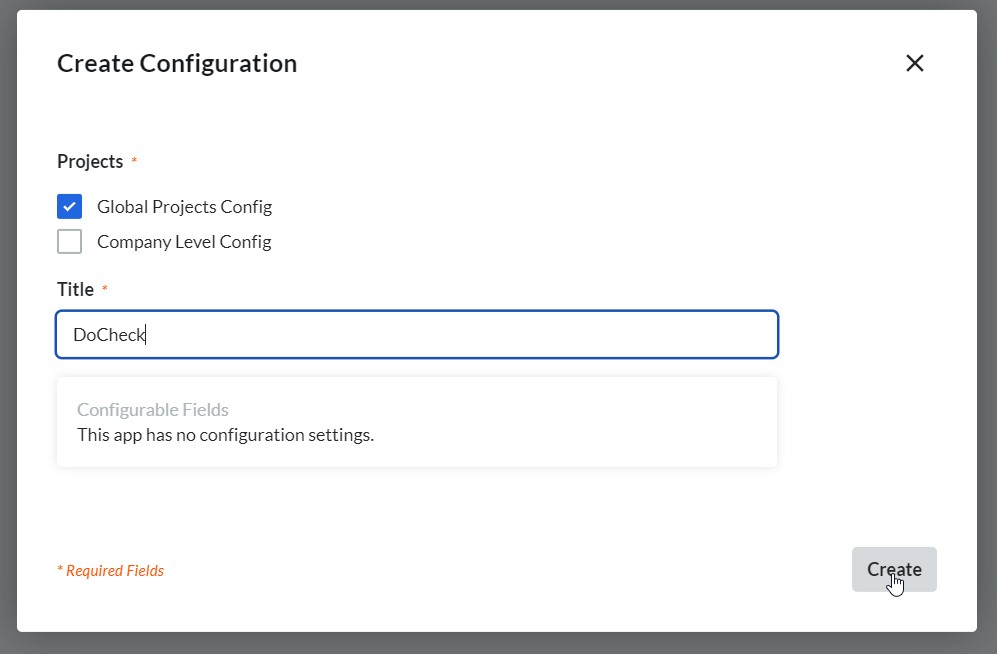
6. On the next screen (see below), select the ‘Global Projects Config’ check box and in the Title field type Docheck. Click Create to proceed.
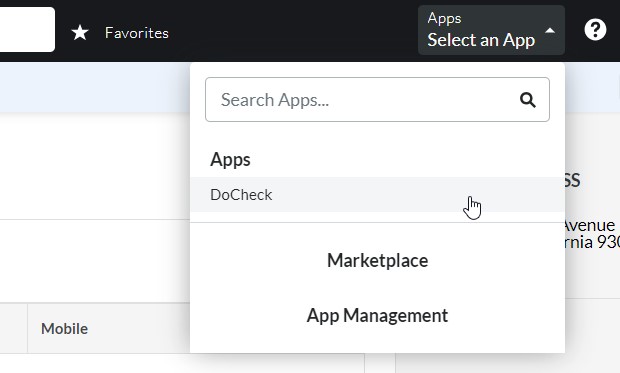
7. Now you can access DoCheck easily from within Procore by doing to the top right-hand corner and selecting it under Apps (see below):
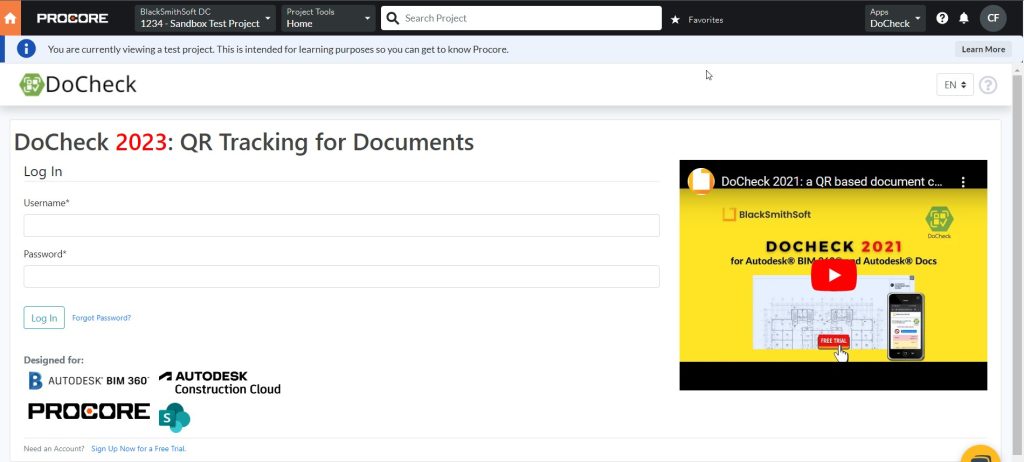
8. DoCheck login page should show. Go ahead and log in. If you do not have an account, you can sign up for a trial from here.
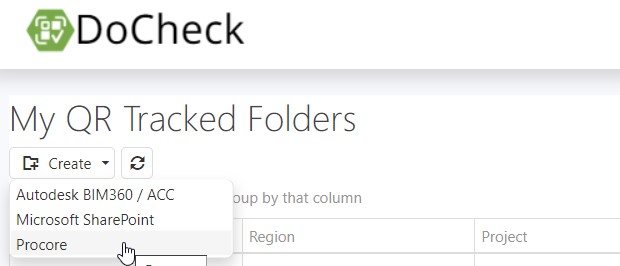
9. Once you are in, click on Create, select Procore.
10. Final step: authorize Procore and click on Allow. Then go to DoCheck admin guide to start selecting folders.

Step by Step Video
Here is a short video of the above steps.